
Disclosure: Shed & Bench is reader-supported and may earn a commission from some products we recommend, at no extra cost to you. Read our affiliate disclosure.
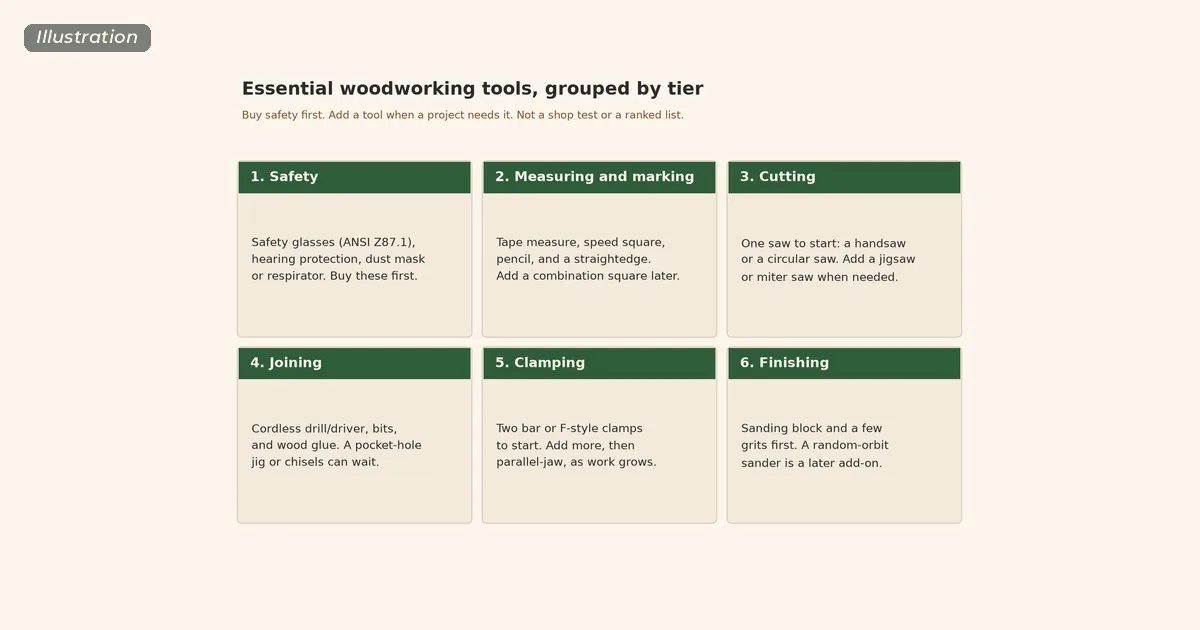
A short list of essential woodworking tools will get a first project done; a wall of machines is the usual way to overspend. This buying guide groups a starter kit into six tiers—measuring and marking, cutting, joining, clamping, finishing, and safety—and explains which tools come first, why, and what to look for.
It is not a ranked list, and it is not based on shop tests by Shed & Bench. We have not bought, compared, or tested the tools named here. Safety points are attributed to OSHA, the U.S. Consumer Product Safety Commission (CPSC), or the tool maker’s manual. No prices are quoted; none were checked live.
For space, power, lighting, dust collection, layout, storage, and a phased shop budget, use our live small woodworking shop setup guide. This page is the tool list that sits next to that guide, not a second copy of the layout or electrical sections.
For projects that fit a small starter kit, see Your First 10 Weekend Builds and our free plans.
Buy in this order, then add as you go
Safety gear comes first, not last. After that, most early projects loop through measuring, cutting, joining, clamping, and smoothing. The six tiers below are a buying order as well as a grouping.
A practical first kit is:
- Safety glasses, hearing protection, and a dust mask or respirator
- A tape measure, a speed square, and a pencil
- One saw: a handsaw for a few small parts, or a circular saw if you will cut a lot of boards
- A cordless drill/driver with drill bits and driver bits, plus wood glue
- Two clamps
- A sanding block and a few grits of sandpaper
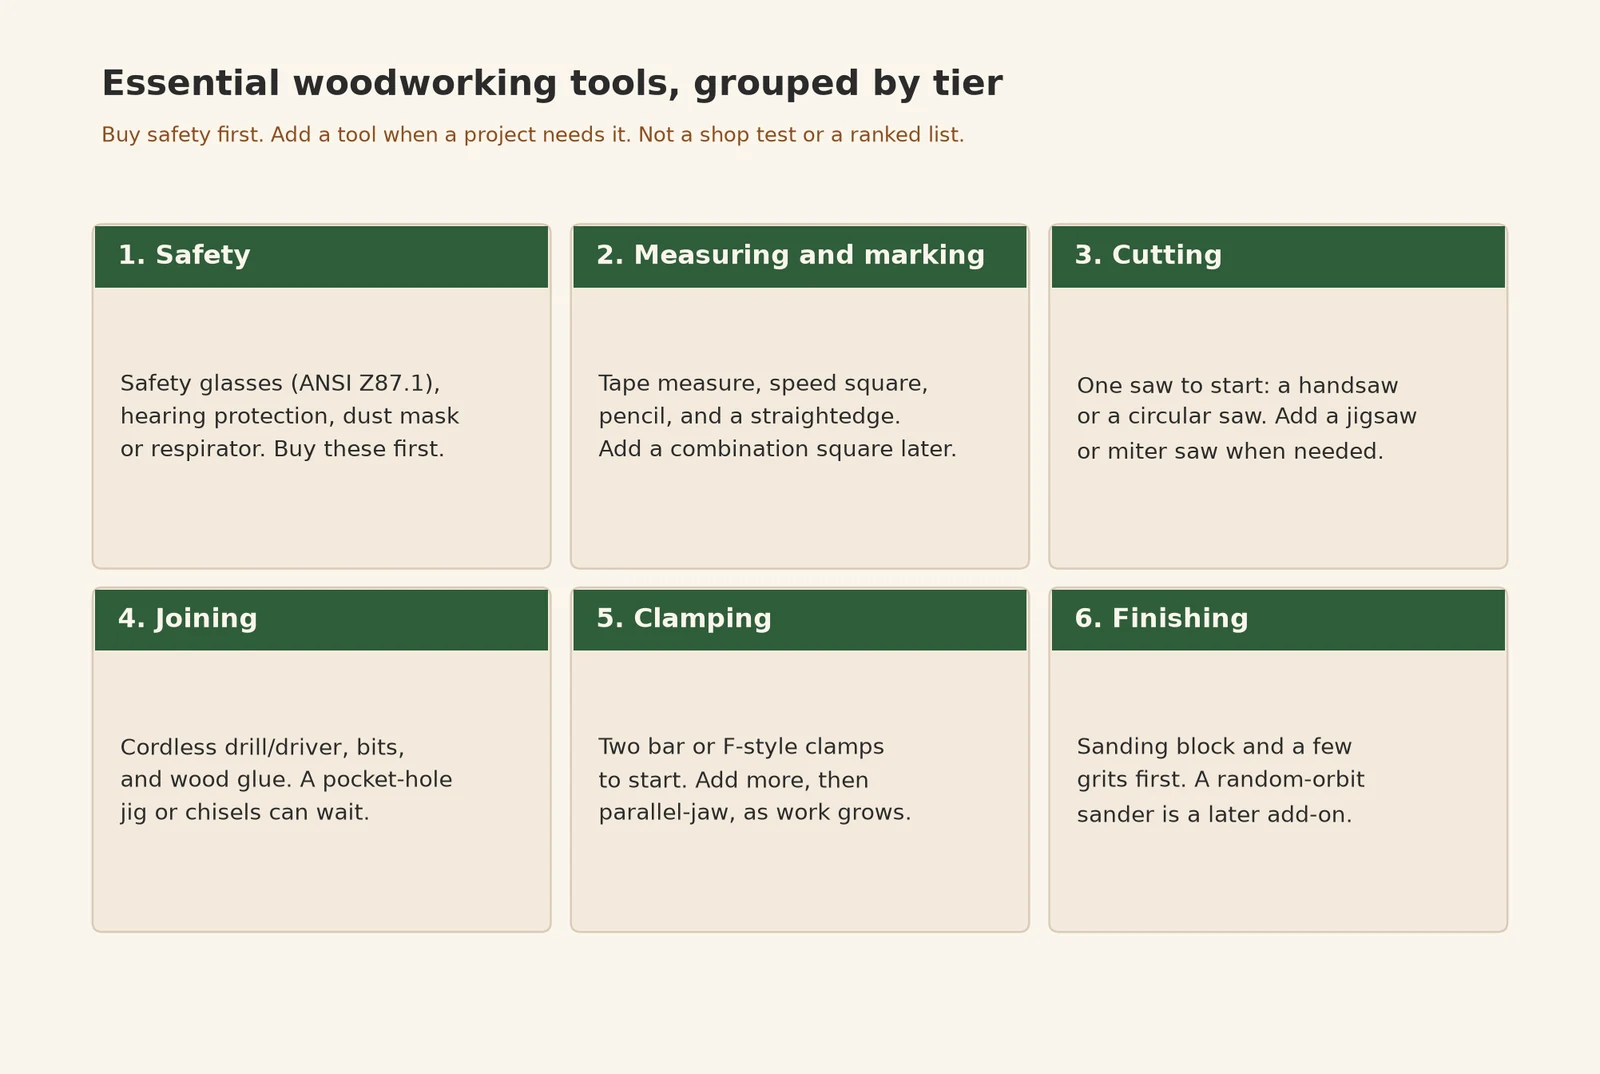
Add a tool when a project you are about to start needs it: more clamps, a jigsaw for curves, a random-orbit sander, or a miter saw for repeatable crosscuts. A table saw, router, or drill press comes later, only when you have the space and power for it.
A boxed “starter kit” can be convenient if the contents match the list above. If it is padded with tools you will not use, buying the items you need may be simpler. We have not compared kits.
Safety tools (buy these first)
Eyes. CPSC’s Home Safe: Power Tools checklist says to wear safety goggles when using power tools, to protect your eyes from flying debris, and to keep hands away from moving parts. OSHA 3151 (Personal Protective Equipment) says ordinary prescription lenses will not provide adequate protection against most occupational eye and face hazards, and that new devices must comply with ANSI Z87.1 (the booklet lists the 2010, 2003, or 1989(R1998) editions) or be at least as effective. Look for an ANSI Z87.1 marking, and a fit that works over prescription lenses if you need it.
Hearing. Use earplugs or earmuffs that seal and stay in place with power saws and sanders, and follow the maker’s instructions.
Dust. OSHA’s wood-dust overview states that dust from sanding and cutting becomes a potential health problem when particles become airborne, and that breathing them may cause allergic respiratory symptoms, mucosal and non-allergic respiratory symptoms, and cancer. The same page notes that the extent of these hazards and the associated wood types have not been clearly established. Wear a dust mask or respirator when you sand or cut, even if a vacuum is running. For shop-level dust control, see the small-shop setup guide.
Machines and manuals. OSHA’s woodworking eTool states that improperly or inadequately guarded machines can lead to laceration, amputation, severed fingers, and blindness, and that operations can be very dangerous when machines are used without proper safeguards. It also notes that wood dust and finishing chemicals may cause skin and respiratory diseases. CPSC’s checklist says to read the owner’s manual, wear snug clothing, remove jewelry that could get caught, not carry a tool by the cord, and keep cords away from heat, oil, and sharp edges. Keep the guards on, and unplug a tool or remove its battery before changing a blade or bit. On a used tool, check that the guards are still there and the cord is not damaged.
Electrical safety, fire extinguishers, and oily-rag storage are in the small-shop guide.
Measuring and marking
You do not need a full cabinetmaker’s set on day one.
Tape measure. A 25-foot tape is a common length for furniture and small shop projects. Look for markings you can read at 1/16 inch, a blade that is not creased, and a hook that is not bent. On many tapes the hook is made to move slightly, by about the thickness of the hook, so inside and outside measurements both read correctly; that is a design feature, not a defect.
Square. A speed square (often sold in a 7-inch size) marks 90° and 45° lines and can ride the edge of a board as a circular-saw guide. A combination square is useful later for transferring a depth or checking a small part.
Pencil and a straightedge. A sharp pencil and a straight scrap or ruler will mark most early work.
Specialty woodworking stores often stock squares, marking tools, and other layout items in this tier.
Cutting
You need one reliable way to cut parts to length. Everything else in this tier can wait.
Handsaw. A sharp handsaw is enough for small projects and for a few cuts when you would rather not set up a power saw. Look for a handle that fits and teeth the maker describes for the cut (crosscut across the grain, rip along it).
Circular saw. A circular saw covers rip and crosscuts on boards and sheet goods. A 7-1/4-inch blade is a common size and will typically cut through standard 2x stock in one pass; 6-1/2-inch cordless models are also widely sold. That is a description of common sizes, not a ranking.
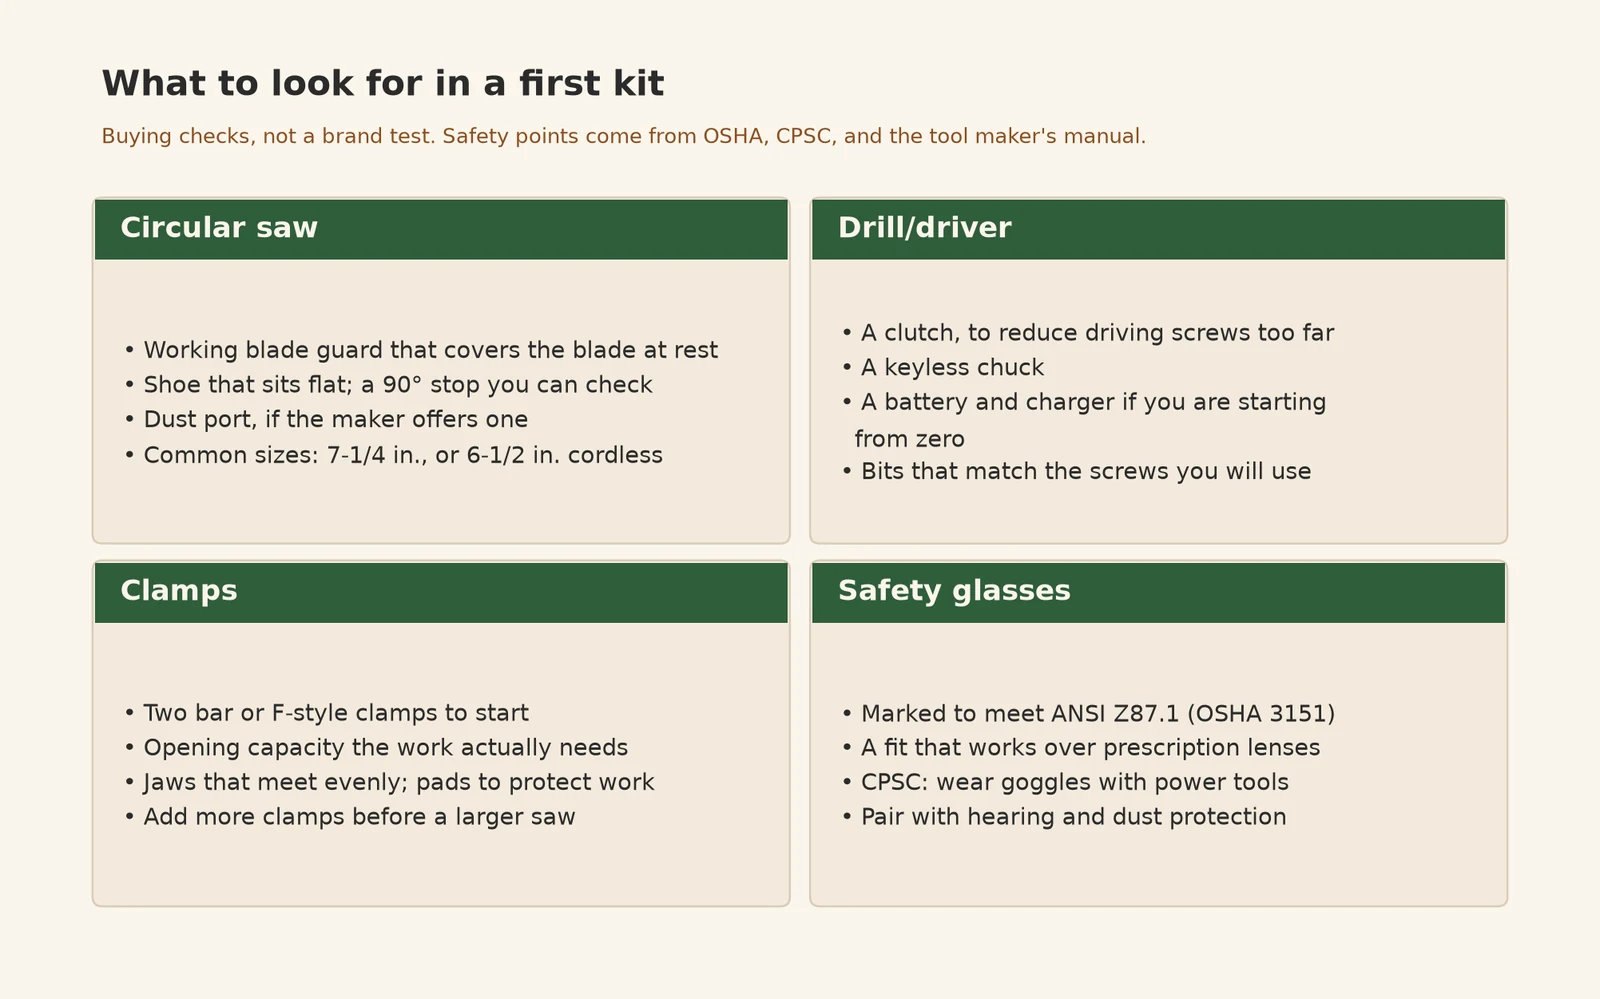
What to look for in a circular saw:
- A blade guard that covers the blade when the saw is lifted and retracts as you cut. OSHA’s woodworking eTool warns about unguarded machines; CPSC tells users to keep guards in use. Do not buy a saw missing its guard, and do not leave the guard off.
- A shoe that sits flat, a 90° stop you can check with your square, and a bevel adjustment if you expect to cut angles.
- A dust port, if the maker offers one, so you can hook up a shop vacuum.
- Corded or cordless is a mobility and power-source choice, not a “winner.” Follow the maker’s manual.
Jigsaw. Add this for curves or an interior cutout. Look for a shoe that stays flush, a way to change blades with the tool unplugged, and a blade the maker rates for wood.
Miter saw. Useful later for repeatable crosscuts. Look for the factory guard and a fence that supports the board. Read the manual, and give the saw clear space on both sides.
Table saw (later). You do not need a table saw to start. CPSC notes that a table saw is one power tool regularly involved in injuries, and says to use the blade guard for through cuts and a push stick for small pieces. It has also advised using the fence for rip cuts and the miter gauge for crosscuts, and not cutting freehand. If you buy one later, look for a blade guard and a riving knife, keep them on for through cuts, and add the machine only when you have the space and power the small-shop setup guide describes.
Joining
Most early joints are glued and screwed.
Cordless drill/driver. Look for a clutch (it helps stop a screw from being driven too far), a keyless chuck, and, if you do not already own batteries, a kit that includes a battery and a charger. 12-volt and 18- or 20-volt platforms are both commonly sold. A higher voltage is not automatically the right buy for small work. Buy a drill you can hold comfortably and a battery platform you are willing to stay with. We have not compared brands or voltages. Pair it with bits that match your screws.
Wood glue. A standard PVA wood glue is the usual indoor choice. For outdoor projects, use a glue the maker rates for exterior use, and follow the bottle.
Pocket-hole jig (optional). A pocket-hole jig is one way to join face frames and similar work when a project calls for it. Jigs sold under the Kreg name are common in this category; this page does not review a brand, and there is no affiliate link here. Wait until a project needs the jig, then follow the maker’s screw-length and spacing guidance.
Chisels and a block plane (later). Add a chisel or two, and later a block plane, when you are cleaning up joints.
Clamping
Glue does not hold a joint on its own while it dries. Start with two bar or F-style clamps long enough for the joints in your first project. Lengths around 12 to 24 inches cover many small box and furniture joints; buy the opening capacity the work needs.
- Bar or F-style clamps are the usual first buy for edge joints and assembly.
- Parallel-jaw clamps come later, for wider panels, when you want jaws that stay closer to square.
- Spring clamps hold light parts or a stop block; they are not a substitute for bar clamps on a glue joint.
- Band or corner clamps wait until a frame or box project needs them.
Look for jaws that meet evenly, pads or a way to protect the work, and a screw or bar that travels without binding. Skip a used clamp with a damaged bar. You will usually want more clamps before you want a larger saw.
Finishing
“Finishing” here means smoothing the surface and, when you are ready, applying a product the maker rates for the piece.
Sanding block first. A sanding block and a few grits of sandpaper (a common progression is around 80, 120, and 180 or 220) will handle most small projects. Replace paper when it is worn; dull paper makes you press harder.
Random-orbit sander (next). Add this for larger surfaces. Look for a dust port you can connect to a shop vacuum, and a pad system (hook-and-loop is common) that lets you change grit easily. Follow the sander maker’s manual, and wear the eye, ear, and dust protection in the safety tier. OSHA’s wood-dust page is why the mask stays on for sanding.
Finish and supplies. Choose a finish the label rates for indoor or outdoor use, and follow the ventilation and dry-time directions. Shop ventilation, oily-rag storage, and fire safety belong in the small-shop setup guide.
Leave room in the budget for consumables: sandpaper, blades, bits, glue, and fasteners add up. Many of these starter tools and consumables are also sold through general retailers.
A paid shop-and-tool collection (optional, secondary)
This page is a free starter list, not a review of a paid product, and it has no main product call-to-action. For a shop layout, a tool-buying order, and storage ideas in one place, Ultimate Small Shop is a guide we’re familiar with. The seller describes a 246-page guide. It’s a shop-setup guide, not a project-plan library.
Affiliate link: we may earn a commission if you buy, at no extra cost to you. Ultimate Small Shop is not made by Shed & Bench. Affiliate disclosure.
For more about this site, see About.
Get the free guide: Your First 10 Weekend Builds
Ten simple, original beginner projects you can build with a drill, a saw, and a couple of clamps, each with a materials list. Sent to your inbox. Unsubscribe anytime. Some emails include clearly labeled affiliate recommendations. See our Privacy Policy.
This form is protected by reCAPTCHA, and the Google Privacy Policy and Terms of Service apply.
FAQs about essential woodworking tools
What essential woodworking tools should I buy first?
Start with safety glasses, hearing protection, and a dust mask or respirator, then a tape measure, a speed square, a pencil, one saw (a handsaw or a circular saw), a cordless drill/driver with bits, wood glue, two clamps, and a sanding block. Add other tools when a project needs them. For space and layout, use the small woodworking shop setup guide.
Do I need a table saw to start woodworking?
No. A handsaw or a circular saw will cut most first projects. A table saw is a later machine, after you have the space and power for it. CPSC notes that a table saw is one power tool regularly involved in injuries and says to use the blade guard for through cuts and a push stick for small pieces.
What should I look for in a circular saw?
Look for a working blade guard, a shoe that sits flat, a 90° stop you can check with a square, and a dust port if the maker offers one. A 7-1/4-inch blade is a common size; 6-1/2-inch cordless saws are also common. Keep the guard on, and follow the maker’s manual.
How many clamps do I need to start?
Two bar or F-style clamps long enough for your first joints will get you started. Lengths around 12 to 24 inches cover many small projects. You will usually want more as glue-ups get larger.
Should I buy corded or cordless tools?
Either can work. Cordless tools are convenient if you stay with one battery platform; corded tools do not depend on a charged battery. This page does not pick a winner. Choose the power source that matches how you will work, and follow the maker’s manual.
What safety gear do I need for woodworking?
Safety glasses or goggles that meet ANSI Z87.1, hearing protection, and a dust mask or respirator for cutting and sanding. CPSC says to wear safety goggles with power tools and to read the owner’s manual. OSHA’s woodworking eTool warns that unguarded machines can lead to serious injury, so keep guards on. Ordinary prescription glasses are not a substitute, per OSHA 3151.
Can I start with only hand tools?
Yes. A handsaw, a tape and square, a drill (or a hand drill), glue, two clamps, and a sanding block will build small projects. Buy a power tool when a project actually needs it.
Is a beginner tool kit better than buying tools one at a time?
Not automatically. A kit is convenient when its contents match the starter list on this page. If it includes tools you will not use, buying the items you need may be simpler. Check the return policy. We have not compared kits.
Sources
Safety points below were checked on Friday, Nov 13, 2026, and are not tests by Shed & Bench:
- OSHA, Wood Dust overview: https://www.osha.gov/wood-dust
- OSHA, Woodworking eTool: https://www.osha.gov/etools/woodworking
- OSHA, Personal Protective Equipment, OSHA 3151 (ANSI Z87.1 and prescription-lens guidance): https://www.osha.gov/sites/default/files/publications/OSHA3151.pdf
- CPSC, Home Safe: Power Tools checklist: https://www.cpsc.gov/s3fs-public/Home_Safe_Power-Tools_Checklist_COVID.pdf
- CPSC, “Consumers Should Spring into Safety with the ‘New Normal,'” 2021 (table-saw fence, miter gauge, no freehand cuts): https://www.cpsc.gov/Newsroom/News-Releases/2021/Consumers-Should-Spring-into-Safety-with-the-New-Normal